Article
0 comment

Docker Desktop for Mac networking stops working after upgrade to MacOS 11 Big Sur

If you see strange connection problems when building docker images on MacOS after updating to Big Sur the reason might be a change in some implementations in the network layer. And the Docker Desktop update doesn’t take these into account because fixing the issue means to delete everything previously built on your machine.

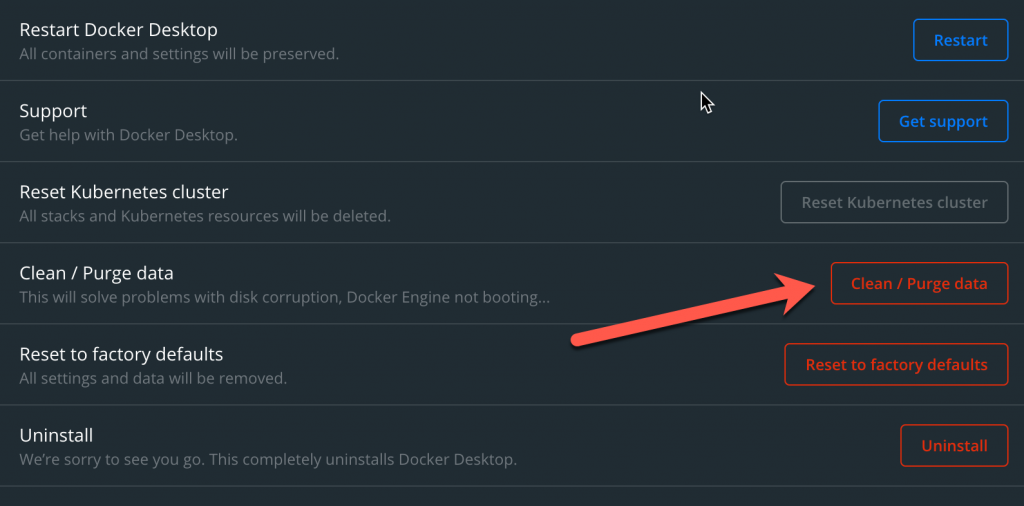
Spcifically, open the Docker Desktop app and klick on the bug icon in the upper right corner:

When the dialog opens, click on “Clean / Porge data”

This will take some time since docker will restart after cleaning. But then your network problems should be gone.

Article
1 comment

Import .env settings in shell script

Sometimes you have a set of environment variables in a .env file. And sometimes you would like to consume them in a shell script. You can do that like this:

export $(cat .env | xargs)

In some special cases you might have the .env file somewhere on the net and would like to include it. Here curl comes in handy:

export $(curl -SsL https://my.coolserver.com/.env | xargs)

This URL also can be a link to some raw file on GitHub or GitLab.

But be careful about what you include from somewhere on the net!

Article
0 comment

I wish I could look at that in my browser …

Sometimes you would like to see some information, which is readily available from a unix command in your browser. If it’s in a private network and / or the information doesn’t do any harm when read by unauthorized people or it’s for a rather short period of time, then ashttp does the trick.
ashttp is a python script by Julien Palard (@sizeof) using a headlesss vt100 terminal emulator to run a script each time the http server gets a request, grab the output and deliver it via http to the requesting browser.
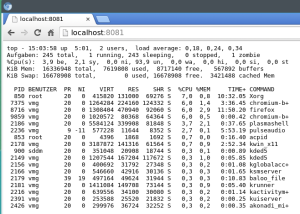
For example the output of top:

ashttp -p 8081 top

This will start up an http server on port 8081 (you can also use –port) and every request to that server will deliver the output of a fresh top command:
ashttp_top
At the moment there seems to be a small problem with forwarding the command line parameters of the unix command, so you can circumvent that by putting your more complex statement into a shebang’ed shell script and calling this one from ashttp:

#!/bin/bash
watch -n1 ls -lah /tmp

Have fun!

Update: @n770 correctly mentioned, that having swig installed is a prerequisite to building the python hl_vt100 module.

Article
0 comment

From JSON to CSV to SQL

The task

I recently had the problem, that I had to insert JSON data sets into a PostgreSQL database. As rows, not as JSON field type.

The JSON represents a network of nodes and links and looked like this:

{
  "links": [
    {
      "source": "22",
      "target": "17",
      "value": 1
    },
    {
      "source": "18",
      "target": "14",
      "value": 1
    },
...
  ],
  "nodes": [
    {
      "name": "Resource 32",
      "image": "/mydemo/images/icon1.svg",
      "group": 1,
      "image_width": 45,
      "image_height": 45
    },
    {
      "name": "Resource 17",
      "image": "/mydemo/images/icon2.svg",
      "group": 1,
      "image_width": 45,
      "image_height": 45
    },
...
  ]
}

What I needed:

  1. 1. split JSON into nodes and links separately
  2. 2. convert to CSV
  3. 3. add an ID field as first column and primary key
  4. 4. number data rows with ID from 1 to n
  5. 5. delete the ugly path “/mydemo/images/”, leaving only the filename
  6. 6. create table in PostgreSQL DB and insert data

Create CSV from JSON

For this I used the brilliant Python based cvskit package. This is done in 2 steps:

The first step completes tasks 1 to 5:

underbrace{tt in2csv -k nodes myfile.json}_{mbox{Term 1}}nolinebreak[4]midnolinebreak[4]underbrace{tt nl -v0 -s,}_{mbox{Term 2}}nolinebreak[4]midnolinebreak[4]underbrace{tt perl -pequad's/hat{quad}{backslash}s+//'}_{mbox{Term 3}}nolinebreak[4]midnolinebreak[4]underbrace{tt sedquad"s/hat{quad}0,/id,/g;s#/visdemo/images/##g"}_{mbox{Term 4}}nolinebreak[4]>nolinebreak[4]mbox{tt nodes.csv}

Term 1: Export subarray with key nodes.
Term 2: Number lines starting with zero (uses unix tool nl). Delimiter is colon.
Term 3: Strip leading spaces.
Term 4: Replace “0,” in first line with col name, strip image path.

The same for the links section of the JSON file:

underbrace{tt in2csv -k links graph3345.json}_{mbox{Term 1}}nolinebreak[4]midnolinebreak[4]underbrace{tt nl -v0 -s,}_{mbox{Term 2}}nolinebreak[4]midnolinebreak[4]underbrace{tt perl -pequad's/hat{quad}{backslash}s+//'}_{mbox{Term 3}}nolinebreak[4]midnolinebreak[4]underbrace{tt sedquad"s/hat{quad}0,/id,/g"}_{mbox{Term 4}}nolinebreak[4]>nolinebreak[4]mbox{tt links.csv}

Term 1: Export subarray with key links.
Term 2: Number lines starting with zero (uses unix tool nl). Delimiter is colon.
Term 3: Strip leading spaces.
Term 4: Replace “0,” in first line with col name.

Insert CSV into database

Now we need another tool from the csvkit tool chain, which reads CSV and builds an SQL CREATE TABLE statement and inserts the data into the created table.

csvsql --db postgresql://user:passwd@localhost/databasename --table node --insert nodes.csv
csvsql --db postgresql://user:passwd@localhost/databasename --table link --insert links.csv


The parameters are:

  • ● -db <DBURL> The database URL to connect to, in SQLAlchemy format
  • ● –table <TABLENAME> What name should the table get? if not supplied, the CSV filename without extension will be used.
  • ● –insert not only create the CREATE TABLE DDL statement but also insert the data sets into the freshly created table.

This tool has (in my opinion) three small drawbacks:

  1. 1. It doesn’t allow you to see the insert statements. The CREATE TABLE statement will be printed to stdout, if you don’t provide a db URL. But there is no way to see the insert statements.
  2. 2. It can’t handle already existing tables. There is no –add-drop option to issue a DROP TABLE statement in advance to create the new one.
  3. 3. It’s not able to autocreate an ID column. This complicates the first step of creating a usable CSV file to some extend, as you can see above.

So the last action is to create the primary key on the id column in both tables:

alter table node add primary key (id);
alter table link add primary key (id);


Even with these little drawbacks the csvkit tool chain has numerous applications. Give it a spin!

Article
1 comment

MacOS Notepad

Kennt ihr das? Es gibt so Dinge, die man alle paar Monate mal braucht, aber nie merken kann? So geht es mir mit MacOS “Spezialitäten” an der Kommandozeile. Deshalb sammle ich hier so Kleinigkeiten, die man immer mal wieder brauchen kann. Vielleicht hilft es ja einem meiner Leser weiter …

ISO Image auf USB Stick “brennen”

Zuerst muß man die Datei ins IMG Format wandeln, dann den Stick unmounten, aber nicht auswerfen und schließlich das IMG binär auf den Stick kopieren. Im wesentlichen entspricht diese Anleitung der auf der Ubutu-Downloadpage.

ISO Images in IMG Dateien wandeln

Wer ab und zu ein ISO Image auf einen USB Stick kopieren möchte, sollte das Image zuvor ins IMG Format gewandelt werden. Das geht mittels:

hdiutil convert quelle.iso -format UDRW -o ziel.img

Gemounteten USB-Stick ausfindig machen

Disk0 ist im allgemeinen die interne Festplatte/SSD des Mac. Um heraus zu bekommen, welchen Devicenamen der USB-Stick hat, gibt man ein:

diskutil list

USB-Stick unmounten

Jetzt müssen wir den Stick unmounten, damit wir ihn beschreiben dürfen. Aber nicht “auswerfen”/”ejecten”, sonst kommt das Betriebssystem nicht mehr an die Hardware.

diskutil unmountDisk /dev/diskN

Image kopieren

Das IMG Image kopieren wir mit dem Diskdoubler dd auf den Stick. Die Parameter bedeuten: if=In-File, of=Out-File, bs=Block-Size (schön groß, damit es schnell geht):

sudo dd if=/path/to/downloaded.img of=/dev/rdiskN bs=1m

“rdiskN” ist hierbei das raw device derselben Platte wie “diskN”. Laut Ubuntu Webpage gehts damit manchmal schneller …

USB-Stick auswerfen

Jetzt können wir den Stick richtig auswerfen, damit man ihn ziehen kann:

diskutil eject /dev/diskN

Article
0 comment

Wie man einen Novell iPrint Drucker manuell auf einem Mac installiert

Die nachfolgende Anleitung habe ich erst einmal als Gedankenstütze für mich selbst zusammen gestellt, weil ich mit Sicherheit morgen schon vergessen habe, wie das ging. Aber vielleicht hilft sie ja auch jemand anders weiter …

Das Netz ist voll von Fehlermeldungen und Hilfeanfragen zu dem Thema, wie man einen per Novell iPrint angebundenen Netzwerkdrucker an einen Mac anbinden kann.
Eigentlich sollte das ganz einfach sein, weil der jeweils zuständige iPrint Server eine Webseite besitzt, auf der alle Drucker gelistet sind. Wenn man den gewünschten Drucker anklickt, geht ein Popup auf, das fragt, ob man den Drucker installieren möchte. Wenn man dann “Ja” sagt, kommt … eine Fehlermeldung, daß die iPrint Library keinen passenden Druckertrieber aufweise, weil der “Administrator” keinen hinterlegt hätte.
Man kann jetzt, wenn man ganz sicher weiß, daß die Netzwerkverbindung zum Drucker steht (alle passenden Ports offen etc.) den Drucker auch von Hand installieren. Dazu geht man wie folgt vor:

  1. Druckertreiber des Herstellers installlieren (bei mir war das ein Dell D3130cn)
  2. iPrint Client von der Novellseite runter laden (dazu braucht man ein kostenloses Login) und installieren
  3. Die Druckerliste des iPrint Servers im Browser anzeigen, also sowas wie http://<Servername>/ipp

Ganz hinten in der Liste gibt es einen Infobutton für jeden Drucker, das sieht etwa so aus:
Bild 1


Den klickt man an, dann sieht man ein Popup mit den Deitailinfos zu diesem Drucker. Das wiederum sieht etwa so aus:
Bild 2


Jetzt markiert man mit der Maus den Servernamen inklusive Queuename, aber ohne das Protokollpräfix ipp://, so wie der rote Kasten das zeigt und kopiert sich den Vogel in die Zwischenablage.

  1. Jetzt geht man in den System Preferences des Mac in die Druckerverwaltung und klickt auf das Plus-Icon zum hinzufügen eines Druckers. In dem aufgehenden Popup stellt man sicher, daß man oben in der Leiste mit den möglichen Protokollen ein “Erweitert” oder “Advanced” sieht. Sollte das nicht der Fall sein: rechte Maustaste in der Zeile, “Symbolleiste anpassen” und das “Erweitert”-Zahnrad in die Iconzeile ziehen, “Fertig” klicken.

  2. Nun klickt man, wie wohl zu erwarten, auf “Erweitert”, dann sucht der Mac eine Zeit lang Drucker im Netz, wird aber wahrscheinlich nichts finden. Nun bekommt man einen Dialog wie den folgenden:
    Bild 3

Obwohl der iPrint-Server ja ipp-Protokoll spricht, wählt man im “Typ” Dropdown “Internet Printing Protocol (iprint)” (1.). Dann pastet man den eben kopierten Servernamen inklusive Queue in das “URL” Feld direkt hinter iprint://. Die letzte Amtshandlung ist, über das unterste Dropdown den passenden Druckertreiber, den man hoffentlich vorher installiert hat, auszuwählen.

  1. Meist versucht der Mac noch herauszufinden, welches Hardwarezubehör installiert ist (Speicher, Papierkassetten, Festplatte, Duplexeinheit). Sollte er das nicht schaffen (was meist der Fall ist), kann man die entsprechenden Features von Hand wählen und den Drucker hinzufügen.

  2. Jetzt sollte alles funktionieren und man kann ein Probedokument ausdrucken …

Article
2 comments

Automatische WordPress Updates ausschalten

Vielleicht ging es dem einen oder anderen so wie mir, als ich heute Mails von meinen WordPress Installationen bekam, die etwa so anfingen:

[Technologyscout] Deine Website wurde auf WordPress 3.8.1 aktualisiert

Ich war ein wenig überrascht und fand dann bei Frank Stachowitz eine Erklärung: das ist ein neues “Feature” von WordPress.

Blöd ist nur, daß man diese automatischen Updates nicht per Admin ausschalten kann, sondern dies per define() Statement in der wp-config.php tun muß. Der WordPress Codex sagt dazu, daß man generell 2 Möglichkeiten hat:

  1. Automatische Core Updates ausschalten bzw. auf minor version Updates beschränken. Von dieser Einstellung nicht betroffen sind dann Plugins, Themes und Sprachdateien.
  2. Automatische Updates generell ausschalten. Das betrifft dann Updates der WordPress-Software selbst sowie Plugins, Themes und Sprachdateien.

Wer sich also wie ich generell ungern in seine laufende Software reinfingern läßt, schreibt irgendwo in die wp-config.php folgende Zeile:

define( ‘AUTOMATIC_UPDATER_DISABLED’, true );

Wer nur Softwareupdates manuell machen möchte, das Beiwerk aber automatisch updaten lassen will, der nutzt:

define(‘WP_AUTO_UPDATE_CORE’, false);

Und wer Softwareupdates bei Unterversionsnummern erlauben möchte, der nimmt:

define( ‘WP_AUTO_UPDATE_CORE’, ‘minor’ );

Man kann in beiden Fällen auch mit Filtern arbeiten, die dann in manchen Fällen eine feinere Abstufung erlauben, aber das kann man dann im Codex nachlesen. Vielleicht hilft dieser Text hier aber schon dem einen oder anderen, eventuelle Unklarheiten zu beseitigen.

Article
0 comment

Dereferencing deeply nested arrays with array_reduce

Sometimes you need to grab a value from a deeply nested array and you get a path description to that value as a string. For example you get a path as

$path = “A.B.C.D.X”;

which refers to a value in an array like this:

$param[‘A’][‘B’][‘C’][‘D’][‘X’] = “Dorky”;

Now you would like to get the value “Dorky” only by using the string description in $path. You need to get every indexing step as a string value by exploding the string at the “.” characters.

$patharray = explode(”.”, $path);

Then you need to go along this path in array form and dereference the $param array down to its value. You could do so with a foreach loop on the $path array. But you can do it more elegant using array_reduce.
Normally array_reduce iterates over an array and gathers (in any sense) information to sum it up in some single value. But you can also replace this “sum variable” by something else. For example by a dereferenced value of an array … you get a clue?
And since we don’t want to pollute our namespaces with callback functions, why not use the new PHP5.3 feature of anonymous functions?
Putting it all together leads to a one liner:

$value = array_reduce(explode(’.’, $str), function($v, $w) { return $v[$w]; }, $param);

To try it out here is the complete script:

<?php
$str=“A.B.C.D.X”;
$param[‘A’][‘B’][‘C’][‘D’][‘X’]=“Dorky”;
$value=array_reduce(explode(’.’, $str), function($v, $w) { return $v[$w]; }, $param);
print_r($value);
?>

Have fun!

Article
0 comment

How to use a Cisco VPN configuration with open source vpnc

Sometimes you get to use Cisco VPN Gateway. And sometimes you don’t have an original Cisco VPN client or it just doesn’t work. This is the case with MacOS Lion 10.7. But wait, there’s rescue!

You could use the open source VPN client vpnc. In my case I used a homebrew port, which could be installed via:

brew install vpnc

To use the binary installed in /usr/local/sbin you need to add /usr/local/sbin to your path. Next you need to convert the original Cisco pcf file into a vpnc conf file with the also installed pcf2vpnc tool:

pcf2vpnc original.pcf newfile.conf

Copy that newfile.conf to /usr/local/etc/vpnc and start up your vpn connection via:

sudo vpnc newfile

You need to enter whatever password (possibly containing a RSA SecurID token) and you should be connected.

Connection could be terminated with:

sudo vpnc-disconnec

Article
0 comment

Virtual LAMP develop environment with vagrant on a Mac

Sometimes its preferable to have a controlled development environment. One way to do so is using a virtualization. One of those is Oracle’s VirtualBox. To use it seamlessly in a Mac based development setup there is a way to boot a VirtualBox headless, that means without a GUI. To make life a bit easier some really smart ruby guys have developed Vagrant, a system to build and control headless VirtualBox installations.VirtualBox also supports port forwarding (for ports >1024, we come to that later) so we’re able to access the services inside the box from the Mac outside. It also supports sharing directories, so we also can access the project files from both sides of the box.
Fortunately Vagrant provides a Ruby config file to setup both sharing and port forwaring in a totally easy way. To get started, please install VirtualBox and Vagrant as described on the respective web sites.
We now need to supply a prebuilt Debian Squeeze box. Graeme Mathieson was so kind to supply it here. We follow his instructions and install tha base debian using a

vagrant box add debian_squeeze_32 http://mathie-vagrant-boxes.s3.amazonaws.com/debian_squeeze_32.box

To start now we need a project directory. I keep all my Vagrant projects in a special directory ~/vagrant. Therein I created a project directory called debian_squeeze since I’m going to create a Debian Squeeze box. In this directory we create a Project using vagrant init debian_squeeze_32. This creates project file named Vagrantfile which is already preconfigured to use our Debian box.. Open that with the editor of your choice and add two lines of port forwarding below the one commented out as anexample:

  config.vm.forward_port “http”, 80, 8080
  config.vm.forward_port “mysql”, 3306, 3306

This will forward the MySQL standard port and the web server port 80 to external 8080. In addition I would like to share a directory, where all my web roots will reside. So please go the comment block below the forwarding examples which presents an example for a share_folder function call and enter the following line:

  config.vm.share_folder “opt-sites”, “/opt/sites”, “/opt/sites”

This means: name this share “opt-sites” and link the internal /opt/sites to the Mac directory /opt/sites. Note that both directives are simple ruby function calles and in both the first parameter is a custom string to identify the share / forwarding internally. And please replace my /opt/sites with the paths you like.
Close the editor and fire up your installation with vagrant up. Log into your box with vagrant ssh You will be logged in as user vagrant who is allowed to administer the system with sudo. Now we can install all the needed PHP5 and MySQL packages. The Debian packaging system will ensure that the services will also be started up so we are ready to proceed.
Log out from the system with CRTL-d and test the web server installation and forwarding by pointing your browser to http://127.0.0.1:8080 You s.hould see the default Apache web page. Now if you’re like me you would like to get rid of that 8080 port. On a mac you can do so by reconfiguring the ipfw firewall with an additional local transparent proxy rule. Luckily a user over at ServerVault called Sammy has done this for a slightly different port setup. Since I don’t like to set up the rule on the command line I installed WaterRoof, a GUI for ipfw. Start WaterRoof and add a rule containing

fwd 127.0.0.1,8080 tcp from 127.0.0.1 to 127.0.0.1 dst-port 80

My rule has the rule no. 1000. This is only for the sequence of execution. With that in effect, you now can access your debian web server with http://127.0.0.1 And y.ou can install some MySQL client tool and access the MySQL server on localhost:3306.
One last note of cation: please don’t use vagrant destroy on your project since that deletes any Debian package installed into your Squeeze box and lets you start with a brand new naked box. Hope you enjoyed and happy hacking.

[Update]
To use the port forwarding on the command line, please use:

sudo /sbin/ipfw -q add fwd 127.0.0.1,8080 tcp from 127.0.0.1 to 127.0.0.1 dst-port 80