This is part one of a short series of posts about Dash.
The repository for this blog posts is here.
Dash is an application framework to build dashboards (hence the name) or in general data visualization heavy largely customized web apps in Python. It’s written on top of the Python (web) micro-framework Flask and uses plotly.js and react.js.
The Dash manual neatly describes how to setup your first application showing a simple bar chart using static data, you could call this the ‘Hello World’ of data visualization. I always like to do my development work (and that of my teams) in a dockerized environment, so it OS agnostic (mostly, haha) and the everyone uses the same reproducible environment. It also facilitates deployment.
So let’s gets started with a docker-compose setup that will probably be all you need to get started. I use here a setup derived from my Django docker environment. If you’re interested in that one too, I can publish a post on that one as well. The environment I show here uses (well, not for the Hello World example, but at some point you might need a database, so I provide one, too) PostgreSQL, but setups with other databases (MySQL/MariaDB for relational data, Neo4J for graph data, InfluxDB for time series data … you get it) are also possible.
We’ll start with a requirements.txt file that will hold all the pyckages that need to be installed to run the app:
psycopg2>=2.7,<3.0
dash==1.11.0
Psycopg is the Python database adapter for PostgreSQL and Dash is … well, Dash. Here you will add additional database adaptors or other dependencies your app might use.
Next is the Dockerfile (and call it Dockerfile.dash) to create the Python container:
FROM python:3

ENV PYTHONUNBUFFERED 1
RUN mkdir /code
WORKDIR /code

COPY requirements.txt /code/
RUN pip install -r requirements.txt
COPY . /code/
We derive our image from the current latest Python 3.x image, the ENV line sets the environment variable PYTHONUNBUFFERED for Python to one. This means, that stdin, stdout and stderr are completely unbuffered, going directly to the container log (we’ll talk about that one later).
Then we create a directory named code in the root directory of the image and go there (making it the current work directory) with WORKDIR.
Now we COPY the requirements.txt file into the image, and RUN pip to install whatever is in there.
Finally we COPY all the code (and everything else) from the current directory into the container.
Now we create a docker-compose.yml file to tie all this stuff together and run the command that starts the web server:
version: '3'

services:

  pgsql:
    image: postgres
    container_name: dash_pgsql
    environment:
      - POSTGRES_DB=postgres
      - POSTGRES_USER=postgres
      - POSTGRES_PASSWORD=postgres
    ports:
      - "5432:5432"
    volumes:
      - ./pgdata:/var/lib/postgresql/data

  dash:
    build:
      context: .
      dockerfile: Dockerfile.dash
    container_name: dash_dash
    command: python app.py
    volumes:
      - .:/code
    ports:
      - "80:8080"
    depends_on:
      - pgsql
We create two so called services: a database container running PostgreSQL and a Python container running out app. The PostgreSQL container uses the latest prebuilt image, we call it dash_pgsql and we set some variables to initiate the first database and the standard database user. You can later on certainly add additional users and databases from the psql command line. To do this we export the database port 5432 to the host system so you can use any database you already have tool to manage what’s inside that database. Finally we persist the data using a shared volume in the subdirectory pgdata. This makes sure we see all the data again when we restart the container.
Then we set up a dash container using our previously created Dockerfile.dash to build the image and we call it dash_dash. This sounds a bit superfluous but this way all containers in this project will be prefixed with “dash_“. If you leave that out docker-compose will use the projects directory name as a prefix and append a “_1” to the end. If you later use Docker swarm you will possibly have multiple containers for the same service running and then they will be numbered.
The command that will be run when we start the container is python app.py. We export port 8080 (which we set in the app.py, bear with me) to port 80 on our host. You might have some other process using that port. In this case change the 80 to whatever you like (8080 for example). Finally we declare that this container needs the PostgreSQL service to run before starting. This currently is not needed but will come handy later, since the PostgreSQL containers might be a bit slow in startup. And then your app might start without a valid database resource.
The last building block is our app script itself:
import dash
import dash_core_components as dcc
import dash_html_components as html
external_stylesheets = ['https://codepen.io/chriddyp/pen/bWLwgP.css']
app = dash.Dash(name, external_stylesheets=external_stylesheets)
app.layout = html.Div(children=[
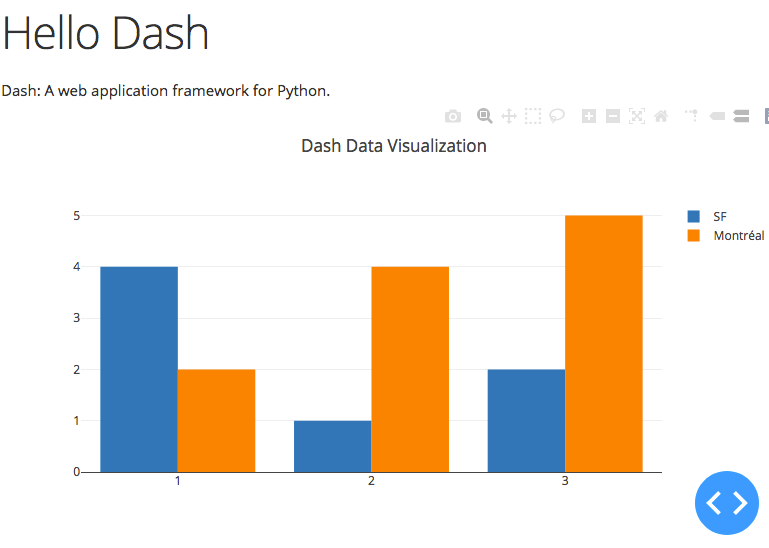
html.H1(children='Hello Dash'),
html.Div(children='''
Dash: A web application framework for Python.
'''),
dcc.Graph(
id='example-graph',
figure={
'data': [
{'x': [1, 2, 3], 'y': [4, 1, 2], 'type': 'bar', 'name': 'SF'},
{'x': [1, 2, 3], 'y': [2, 4, 5], 'type': 'bar', 'name': u'Montréal'},
],
'layout': {
'title': 'Dash Data Visualization'
}
}
)
])
if __name__ == '__main__':
app.run_server(host='0.0.0.0', port=8080, debug=True)
I won’t explain too much of that code here, because this just is the first code example from the Dash manual. But note that I changed the parameters of app.run_server(). You can use any parameter here that the Flask server accepts.
To fire this all up, use first docker-compose build to build the Python image. Then use docker-compose up -d to start both services in the background. To see if they run as ppalnned use docker-compose ps. You should see two services:
Name         Command                         State  Ports
-----------------------------------------------------------------------------
dash_dash    python app.py                   Up     0.0.0.0:80->8080/tcp
dash_pgsql   docker-entrypoint.sh postgres   Up     0.0.0.0:5432->5432/tcp
Now point your browser to http://localhost (or appending whatever port you have used in the docker-compose file) and you should see:
You now can use any editor on your machine to modify the sourcecode in the project directory. Changes will be loaded automatically. If you want to look at the log output of the dash container, use docker-compose logs -f dash and you should see the typical stdout of a Flask application, including the debugger pin, something like:
dash_1 | Running on http://0.0.0.0:8080/
dash_1 | Debugger PIN: 561-251-916
dash_1 | * Serving Flask app "app" (lazy loading)
dash_1 | * Environment: production
dash_1 | WARNING: This is a development server. Do not use it in a production deployment.
dash_1 | Use a production WSGI server instead.
dash_1 | * Debug mode: on
dash_1 | Running on http://0.0.0.0:8080/
dash_1 | Debugger PIN: 231-410-660
Here you will also see when you save a new version of app.py and the web server reloads the app. To stop the environment first use CTRL-c to exit the log tailing and issue a docker-compose down. In an upcoming episode I might show you some more things you cound do with Dash and a database.