Introduction and Overview
For some of you it might be pretty obvious how to do that. But for some of my readers this might be a new topic. So here is a short overview of how to do it:
- Test if it works:
- Prequisite: you’ll need a locally running web server with PHP support. If you don’t have one, you could try to test the merge on a second web server, but alas that’s out of the scope of this posting.
- Download the destination blog and install it locally.
- Install the WordPress Command Line Tool.
- Download all articles from the source blog as XML file.
- Install the WordPress Import plugin.
- Try to import the XML file.
- If all works well, repeat that (without step 3 since the URLs are ok for production) in the production instance of the destination blog.
Local test
Download destination blog
First we need a download of the blog, where all postings should be merged together. This means:
- Zip or tar the whole WordPress directory together, get it down to your machine.
- Install it as a virtual host on your local web server.
- Get a full export of your WordPress database.
My WordPress directory was called “www” and resided in /opt/sites/de/technologyscout (that’s how all my web server document roots are organized /opt/sites/TLD/DOMAIN/SUBDOMAIN). So I downloaded it to my laptop, moved it to /opt/sites (yes, I maintain that also locally) and renamed it to “techscout”.
If you’re like me, it’s a good idea, to look up the database credentials in WORDPRESSROOT/wp-config.php:
define('DB_NAME', 'xxxxx');

define('DB_USER', 'yyyyy');

define('DB_PASSWORD', 'zzzzz');
I also like to have exactly the same credetials locally, so at the MySQL command line I do:
grant all on xxxxx.* to yyyyy@localhost identified by 'zzzzz';

flush privileges;
Then I import the downloaded WordPress database with:
mysql -uyyyyy -pzzzzz xxxxx < database.sql
Install WordPress Command Line Tool
Since WordPress has a habit of saving absolute URLs in the database, which is btw. a very bad and stupid habit, we need to patch those URLs to work locally. This is done with the indispensable wp-cli tool:
wp search-replace 'http://www.technologyscout.de' 'http://techscout'
This will replace every occurrence of http://www.technologyscout.de with http://techscout. Now please try to log in with your credentials. Everything should work locally now. Please have a look at the URL in your browser after login. If you see the productive URL (for me http://www.technologyscout.de) this means the search and replace didn’t work as expected.
Download XML archive with all postings
Please go to Tools -> Export in the admin and select “Posts”. You’ll see additional options. I selected:
- Categories: All
- Authors: All
- Start date, End date: Nothing, just go with –Select–
- Status: All (You can only import published posts, if you like)
Now click on “Download Export File” and save the file locally.
Install WordPress Import plugin
Now please go to Tools -> Import inside the admin panel. You will see a list of options similar to this one:
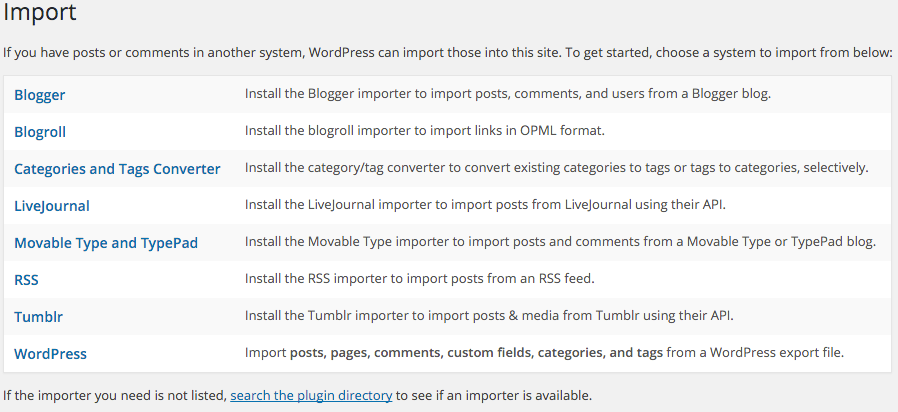
Please select the last entry called “WordPress” (who could guess that, right?). If you didn’t have the WordPress import plugin installed WordPress will ask you if you would like to do so right now. We certainly want to. After installing the plugin, we are ready to …
Import the WordPress XML file
Proceed by selecting the input file we just downloaded. Everything should work smoothly. The imported postings should be sorted according to their original date into the database.
Do it in production
It’s a good idea to get a database backup of your production destination database before importing the blog posts. Then go to Tools -> Import, install the import plugin if needed, and import the XML file we already used locally.
That’s all. Have fun!
1 Comment so far